This sample is all about the interaction components: RadioObservers and RadioInteractors. It uses a basic scene and radio, but more complex functionality.
Accessing the sample
First, install the sample through Unity’s Package Manager. Navigate to Assets/Samples/Ryle Radio/[version]/Interaction Components, and open MainScene. It should look like this: 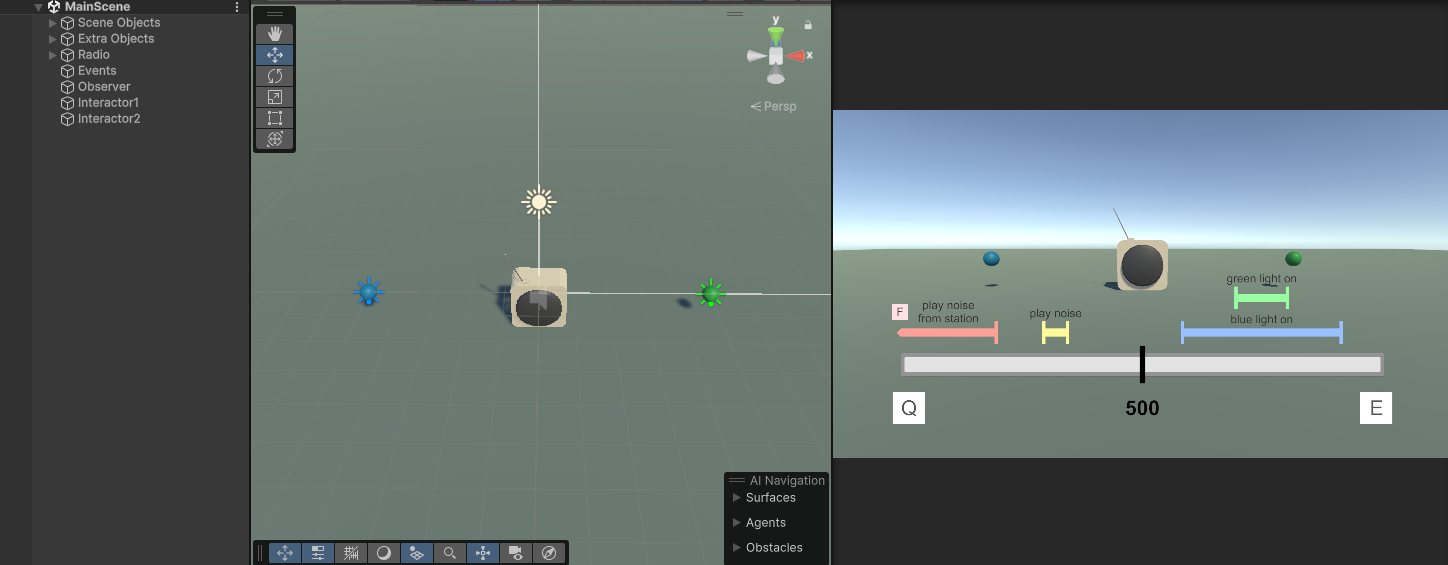
Description
RadioData
Let’s have a quick look at the RadioData we’re using in this scene. It’s similar to, but has some significant differences from, past RadioData objects from other samples.
music
Ol’ reliable! This track just plays a song as we’re used to- nothing unusual on this one.
track_sfx
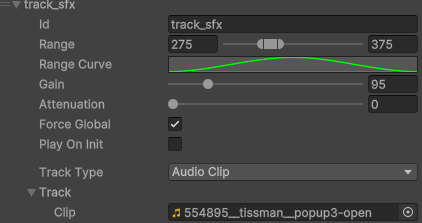 This track is normal, except for one difference- Play on Init is toggled off! This means that the track will never play automatically or on its own- we have to manually play this track. We’ll find out where that happens in a little while!
track_sfx_silence
Now this is a strange one. This is a silent track that plays no noise. Why is it here, then? This silent track is used to attenuate the static audio even when there’s no sound playing on track_sfx above. Because we have to manually start the audio in track_sfx, there’s going to be an amount of time where nothing is playing through that track. Usually, audio that’s attenuating to the volume of a track that isn’t playing anything will behave as if the track isn’t there. We don’t want this here, because that would make the static sound as if it’s getting louder and quieter constantly! In order to prevent it from happening, then, we use this silent track to permanently lower the volume of the attenuating static track when it’s in the same area as this track and track_sfx. In short- we use silence to keep the static quiet when track_sfx isn’t playing anything.
station_sfx
Same as track_sfx, but instead of a single audio track we use a Station. The station is identical to from 1. Basic Radio Sample.
station_sfx_silence
Silence for the same reason as track_sfx_silence- keeping the static quiet when nothing is playing on station_sfx.
static
The same as usual- run of the mill static with a high attenuation value so that it gets quieter when another track (including a silent one) is playing.
Scene
With that out of the way, let’s have a look at the scene for this sample. Our first object is our typical Radio. It uses the model as per usual, and a RadioOutput as we’re used to. Then we start looking at the more unusual objects- our Observers and Interactors. We should go over Interactors first, otherwise some actions of the Observers won’t make sense :)
Interactors
RadioInteractors are very unusual components compared to those we’ve used previously. They don’t actually do anything on their own- they’re more of a gateway for other components and code to interact with your radios. You can reference them in events (such as those in Observers) and from custom code to do various radio-related actions, namely playing, pausing, stopping, and resetting tracks! 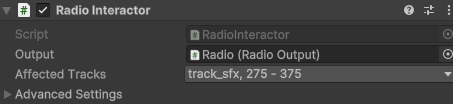 With that being said, they do have values editable in the inspector that are worth explaining- the variables under Advanced Settings are a lot more niche, so those have been relegated to the code documentation.
Output
Unlike other components, Interactors and Observers reference the RadioOutput component rather than its RadioData (this is so that it reponds to only one Output, not all of them)! Assign the Output you want to be performing actions on here.
Affected Tracks
We’re familiar with this option from our Broadcasters and Insulators- we choose here which tracks we want the component to influence. For our interactors, we’re choosing which tracks we want them to play, pause, etc.
Important note: Because you choose the tracks here, you need to create multiple interactors if you want to interact with different groups of tracks separately (e.g: playing one track and stopping another)! This is an unfortunate limitation of the Unity inspector with our editor code.
Okay, so how do we use the Interactor? What does it do?
How we use Interactors and.. what they do
Well I’m glad you asked! In order to make an Interactor actually do something, we need some way to call it- this is usually in the form of a UnityEvent. There’s a bunch of these in RadioObservers, but in this sample scene we have some demo ones on the Events object. Click on the “Events” object in the scene, open the dropdowns in the inspector, and you should see the following: 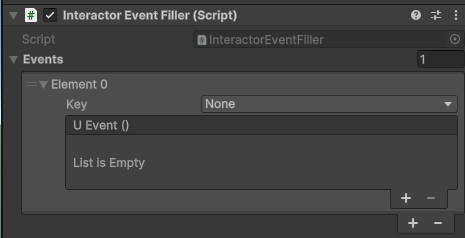 Now, we make stuff! Yep, this sample’s interactive. How wonderful! First, select a key on the dropdown. It can be anything, but given how awful Unity’s selection option is for KeyCodes (I’m sure it’s at least part of the reason they’re pushing away KeyCodes to begin with), one of the F1 - F4 keys should suffice. Then, add a new entry in the event (the inner plus symbol).
 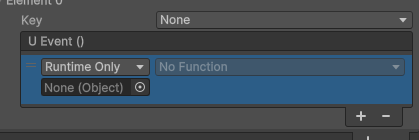 Next, drag one of the Interactor objects in the scene into the “None (Object)” box- this points the event towards that object.
 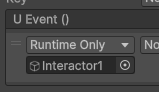 Now, we choose the methods to call on the interactor- we choose what to make it do. Every interactor has (at least) four methods available to us in events and code: PlayLoop, PlayOneShot, Pause/Unpause/FlipPause, Stop and Reset. For a quick overview:
- PlayLoop plays a track. Once that track reaches the end, it’ll loop back to the beginning. Only tracks with AudioClips can reach the end, but it’s better to use this for everything unless you specifically need it to be a OneShot.
- PlayOneShot plays a track. Once that track reaches the end, it stops.
- Pause pauses a track, temporarily stopping it from playing. Unpause lifts the pause on a track, resuming its playing. FlipPause pauses the track if it’s not paused, and unpauses it if it is.
- Stop makes the track stop playing immediately- even if it’s a Loop. You can’t unpause it after it’s been stopped!
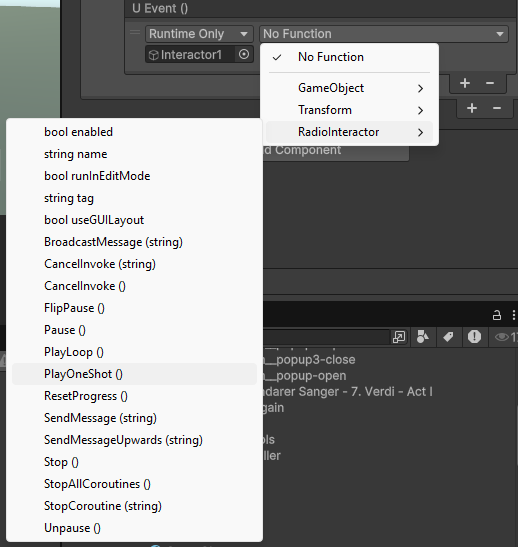
- Reset makes the track go back to the beginning, and clears the recently played tracks if it’s a station. We can choose these methods in the event! Press the “No Function” button, and highlight RadioInteractor. Here we see all our radio methods, and the extra methods provided by Unity! For now, let’s choose PlayOneShot.
 Before we hit play, though, let’s make sure we know which track we’re playing by checking the interactor you’ve chosen. It’ll likely be either the red or the yellow section of the line in the game view, but feel free to check the RadioData. Alright, that’s it! We’ve just set up a RadioInteractor with a UnityEvent so that it plays a sound whenever a key is pressed. Head into play mode, move the radio tune to the track you’ve chosen, and hit the key you picked- lo and behold, there’s your track playing! If you spam the key, it’ll keep making more, layering them on top of one another- the magic of one-shots :)
So let’s just reiterate so that the title of this section doesn’t go to waste. RadioInteractors can be used through UnityEvents like those in the scene (or those on Observers, as we will see shortly)- or through code. They let us interact with tracks during the project’s runtime- playing, pausing, etc.
Awesome! So that’s how we interact with tracks while they’re playing. But how do we watch them, waiting for certain things to happen- like a track being particularly loud, or the radio’s tune being in a certain area? With Observers… :)
Observers
RadioObservers are a component quite different to those we’re used to, even Interactors. Rather than altering the radio and how it plays, an observer makes things happen in response to changes on the radio. Let’s check out the observer in the scene. 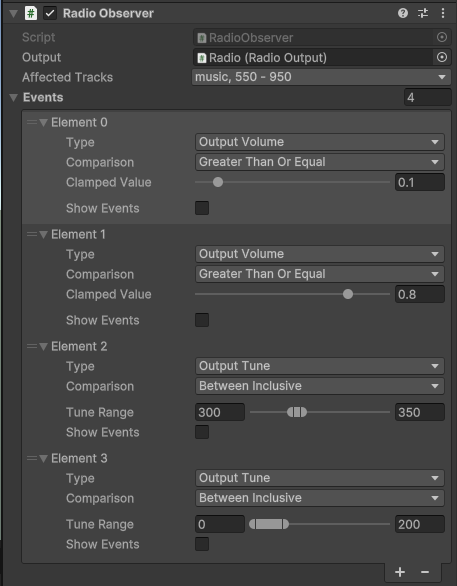 RadioObservers have two main variables at the top- the RadioOutput it is linked to, and the tracks that it watches (Important note here too: this also means you’ll need multiple observers to watch for different events on different tracks, e.g one track getting louder, another getting quieter). Think of an observer like, well, an observer- it watches for certain changes or events, then alerts others in response. You can specify in the Affected Tracks variable which tracks it watches for those changes on. More importantly, though, are the events!
Observer Events
There’re only three consistent variables in observer events- except for Show Events, but I’m sure you can work out what that one does in practice :)
Type
The Type of the event is what exactly it’s observing, what type of change it’s watching for. Click on the dropdown to see the list of them- some are relatively obvious, such as Track Start, or Output Volume- but others are a little less intuitive, like Output Tune. A quick explanation for each:
- Output Volume is the overall volume of the track depending on tune, broadcasters, insulators, and anything else that changes the volume (except for gain).
- Gain is the gain slider on the individual track. Usually doesn’t change, but this option is here just in case.
- Tune Power is the volume of the track depending on where the Radio’s tune value is. You know how tracks get louder and quieter depending on the Radio’s tune? This is measuring that.
- Broadcast Power is how strong nearby broadcasters are for this track.
- Insulation is how strong insulators around the Output are for this track.
- Track Ends is called when the Affected Track(s) ends, and Track Starts is called when it starts. Shocking reveal, really- though they do hide the Comparison variable when selected
- Output Tune is called when the tune of the RadioOutput is in a certain range. Affected Track does not matter for this option.
- None is a filler for when you don’t want the event to be called. You can use whichever type works best for your circumstance :)
Comparison
The comparison of the event is how it decides whether or not a change is the right one. The options are self-explanatory (mostly), and if you have an understanding of number comparisons will make immediate sense! The only confusing ones are Between Inclusive vs Exclusive- inclusive will count when the number is at exactly one of the two values on the edge of the range- exclusive will not. This really only matters if the range goes all the way to the end of the line- you don’t want something not to work because the player has tuned all the way to 0 on a 0 - 50-ranged track!
These specific Observer Events
We’ll go through them one by one. Keep an eye on the UI in the scene, with the line representing tune- I’ll link back the events each to their part of the UI!
Event 1: Output Volume
 This event is watching a value called Output Volume- this is the volume of the track according to the radio’s tune, broadcast power, and insulation- but not the track’s gain. It watches for the output volume to be above 0.1, then, which would mean it’s at least partially audible. In the scene, this event is represented by the blue UI line and the blue light- when the output volume is above 0.1, the light will turn on!
If we hit the “Show Events” toggle, though, we can see all the UnityEvents that this is linked to- just like we were using before! In the OnTrigger event, the blue light will be turned on and its material switched to a brighter one, and OnEnd the reverse will happen. These events will be called at different times:
- OnTrigger will get called when the change first happens. In this case, it will get called the moment the track is loud enough.
- OnStay will get called every frame after the change has first happened, while it’s still happening. In this case, it’ll get called every frame that this track is above the volume threshold.
- OnEnd will get called when the change ends- when the volume goes back below the threshold.
We can make sense of this event, then- whenever the volume of the track crosses a certain threshold, the light will turn on. When it goes back down past the threshold, it turns off.
Event 2: Output Volume
 Just like the previous event, this one is watching for the volume of the affected track(s) to be above a certain threshold. In this case, it’s waiting for it to be above 0.8- this means both the blue and green lights will be turned on when the tune allows the track to be loud enough.
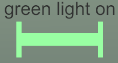
The events on this one are very similar to Event 1- they turn on and off the green light and its brighter material. This is mostly used to show you that both events can happen at once!
Event 3: Output Tune
 This event, though, watches for the output tune of the radio- the affected track has no input here. When the RadioOutput’s tune value is within the specified range (300 - 350), it’ll will be triggered regardless of which track is playing!
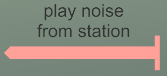
This is when our Interactors come in. This event calls the PlayOneShot function on the interactor linked to the track at about this range. That means that whenever the radio tune enters that track’s range, it plays that track! This works in tandem with the Interactor event we set up earlier- pressing the key you specified will play this noise too (unless you used the other interactor)!
Event 4: Output Tune
 This event, much like the last, will play a sound when you enter its range. This one, however, affects a station. You’ll notice, then, that when it’s triggered, it will pick one random track from the station and play that. Interesting :)
Event 5: Track End
This final event waits for the music track to end, then performs a method- just one! The track start/end observer events can only be triggered when- well, the track starts or ends. This means there’s no point in having OnStay and OnEnd events, as they’d all be called at the exact same time! The event here simply plays a few particles on top of the radio when the music ends.
Putting it all together
So now, if you run the scene, you should notice the lights, particles and the radio itself changing as you tune it, with another noise being played according to the event you set up earlier. Feel free to play around with the Observer events and interactors a little more to get a feel for them- you should be able to do most interactions with the radio through both (or just one) of these :) If you’re having issues, feel free to contact me about them- though I would recommend looking through the code docs first.
Guide over :)
That’s the end of the guide for the Interaction Components Sample! I hope this was a helpful look into how these components work, and how to interact with the radios in general.
Any issues you have, first check (Predicted) Common Issues and Questions as usual, then contact me if you feel so inclined.
This is the last sample guide for now! My hands need a typing break :)